How to Start Woodworking Projects as a Complete Beginner
Key Takeaways
- Use the evidence and verification questions in this guide to make a fit-based decision.
- Check current instructions, safety limits, pricing, and terms before acting.
- Pause and seek qualified help when the situation exceeds the guide’s scope.
“This post contains affiliate links. If you purchase through these links, I may earn a commission at no extra cost to you.”
The safest way to start woodworking is to make the first project smaller in uncertainty, not merely smaller in physical size. A beginner needs a clearly scoped object, a plan that can be understood, materials that can be sourced, tools that can be used safely, a workspace that supports the operations, and checkpoints before irreversible cuts or assembly.
This guide moves from project choice to plan review, skill check, setup, dry fit, assembly, finishing, and post-project learning. It does not provide a universal tool list or build plan because those details depend on the chosen project and current manufacturer guidance. When an operation is unfamiliar or safety-critical, qualified instruction comes before the project.
Begin with the job, not the tool
Choose an object that solves a simple, clearly defined need. Describe where it will be used, what it must hold or support, who will interact with it, and whether it will be indoors, outdoors, installed, moved, climbed on, or exposed to food, water, heat, or weather. These conditions affect design and safety.
A physically small object can still be complex if it requires precise joinery, difficult stock preparation, curves, moving parts, installation, or a demanding finish. A larger but straightforward assembly may be easier to understand. Judge complexity by operations and consequences, not appearance.
Avoid using a first project to improvise around structural loads, utilities, building attachment, children’s equipment, animal containment, climbing, or public use. Those applications may require professional design, codes, standards, or inspection. Choose a lower-risk learning object.
Write a one-sentence project definition before browsing plans. If the definition keeps expanding, split the idea or postpone features. A clear first project creates a boundary for purchasing tools and materials.
Choose a plan that teaches enough
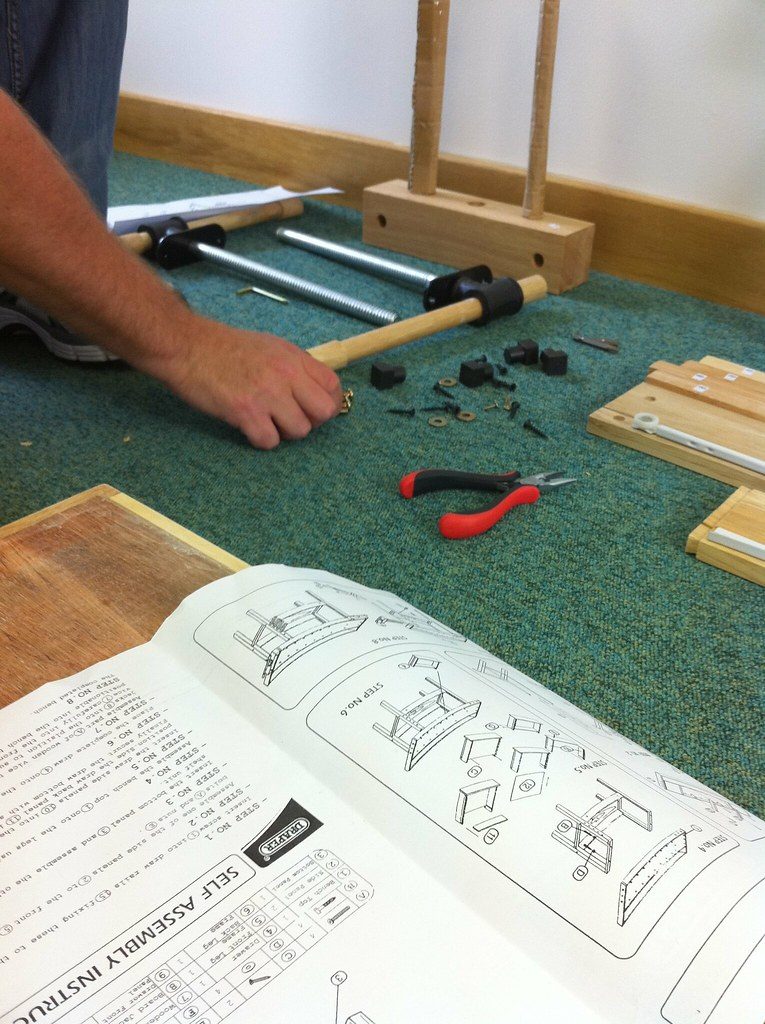
A beginner plan should show the finished object, dimensions, parts, materials, hardware, tools, sequence, and important safety or use limits. It should connect drawings to written steps and identify checkpoints. A photo and cut list alone may not teach assembly logic.
Inspect a legitimate preview or sample. Check whether labels are consistent, orientation is clear, dimensions can be traced, and the materials list matches the parts. Look for missing operations hidden between steps, such as preparing stock before cutting or checking alignment before fastening.
The plan should match the unit system and material availability the reader can use. Converting dimensions or substituting stock can affect fit, strength, hardware, and appearance. When the plan does not explain the change, seek qualified guidance.
Digital plan collections can help with discover
Map every operation before buying
Read the plan from beginning to end and list the operations it requires. Cutting, drilling, routing, sanding, shaping, clamping, assembly, finishing, installation, and lifting each contain separate skills. A familiar tool name does not mean the operation is understood.
For each operation, identify the controlling instruction source. The project plan explains project intent; the current manufacturer manual explains the tool; material safety information explains relevant handling; and qualified instruction fills skill g
Mark the operations that are irreversible or safety-critical. These deserve a pause point in the workflow. A beginner should be able to explain the setup, support, measurement reference, intended result, and safe stop before beginning.
If an operation cannot be understood from appropriate instruction, redesign the project, choose a different plan, or learn under qualified supervision. Buying a specialized tool to preserve an unsuitable plan can increase both cost and risk.
Audit the workspace
The workspace must support the actual material and operation. Consider stable support, lighting, ventilation, dust collection or control, electrical supply, noise, safe movement, storage, and separation from children, animals, visitors, and combustible materials. Local rules and housing conditions may limit what is appropriate.
Plan where long or large material travels before, during, and after a cut. Clear the path and avoid positions that trap the operator or bystander. The correct clearance depends on the project and tool; this article does not supply dimensions.
Keep the floor and work surfaces free from avoidable obstacles. Cords, offcuts, clamps, packaging, and loose hardware can create trip or handling hazards. Cleanup is part of setup, not only an end task.
Finishing may require a different environment from cutting and assembly. Verify ventilation, fire risk, storage, disposal, drying, and personal protection using the current product information. Do not assume a finish is suitable because it is common in project photos.
Build a project-specific tool list
Start with the plan’s required operations, then identify tools that perform them. Avoid generic “must own” lists. A tool is useful only when it is appropriate for the operation, workspace, material, and current skill.
Separate measuring and marking, work holding, cutting, drilling, shaping, assembly, surface preparation, and finishing needs. This reveals where an apparently simple project depends on accuracy or specialized setup. It also prevents buying duplicate tools that solve the same problem.
Verify every tool’s condition, guards, accessories, compatible materials, maintenance, and current manual. A borrowed or used tool still requires complete instructions and inspection. Missing safety components are not a budget solution.
Personal protective equipment should be selected for the actual hazard and tool guidance. No universal combination is prescribed here. Hearing, eye, respiratory, skin, and clothing considerations can differ across operations and materials.
Verify materials and hardware
Match the plan’s material specification to locally available stock before purchasing. Confirm dimensions, grade or quality where relevant, moisture or condition, flatness, defects, and suitability for the intended environment. The plan or qualified source should control structural choices.
Check hardware, fasteners, adhesives, and finishes as a system. Similar appearance does not establish equivalent strength, corrosion resistance, cure behavior, or compatibility. Use current manufacturer information and avoid unverified substitutions in critical uses.
Inspect material before layout. Warped, twisted, cracked, contaminated, or damaged stock can change both accuracy and safety. The correct acceptance criteria depend on the project; ask a qualified supplier or instructor when uncertain.
Plan material handling and storage. Sheet goods, long stock, and heavy assemblies can exceed comfortable control even when the final object seems manageable. Arrange help or a different method rather than improvising under load.
Translate the plan into checkpoints
Break the sequence into meaningful states: material prepared, parts marked, critical cuts complete, joinery checked, dry fit complete, assembly aligned, surface prepared, finish applied, and final use reviewed. The exact stages should follow the plan.
At each checkpoint, compare the work with the drawing and the next dependency. Confirm labels, orientation, repeated parts, mating surfaces, hole locations, and hardware. The purpose is to catch an error before it becomes hidden or multiplies.
Do not chase small inconsistencies by making an unplanned cut. Stop and determine whether the plan, measurement, material, or previous operation caused the mismatch. A qualified instructor can often help a beginner choose the correct reference.
Photographs and notes can help the reader remember setup and identify where a mistake began, provided they do not distract from tool safety. Records are for learning, not for inventing performance scores.
Rehearse uncertain steps without hazardous shortcuts
A dry rehearsal can clarify sequence, hand position, support, clamp access, and assembly order before tools are active or adhesive is applied. Use inactive equipment and safe materials as appropriate. The manufacturer manual remains controlling for actual operation.
Scrap practice may help with marking, drilling, joinery, sanding, or finish appearance when the material and method are appropriate. Practice does not certify competence, and scrap with hidden fasteners, contamination, or defects can be hazardous.
Avoid rehearsal that disables guards, uses unstable support, or creates a smaller piece that is harder to control than the real part. The goal is to reduce uncertainty, not simulate danger.
If the operation still feels unclear after review, stop. Qualified demonstration or a redesigned joint can be the correct project decision.
Mark from consistent references
Accuracy begins with consistent reference faces, edges, and orientation. Follow the plan’s marking system and label parts in a way that remains visible until assembly. Repeatedly measuring from different edges can compound errors.
Verify the measuring and marking tools against the project’s needs. Do not assume two tools agree simply because both have scales. The tolerance required belongs to the plan and operation, not a universal beginner rule.
Before cutting, compare the marked part with the drawing, the mating part, and the material-use plan. This pause can prevent mirrored pieces, reversed orientation, or consuming stock needed later.
Dry fit before permanent assembly
A dry fit checks whether parts come together in the intended sequence before fasteners, adhesive, or finish makes correction more difficult. Confirm orientation, contact surfaces, alignment, clamp access, hardware, and the ability to measure the assembly.
Do not force a poor fit without understanding the cause. Excess force can damage parts or create an unsafe assembly. Identify whether the issue is material condition, measurement, cut quality, hardware, or plan interpretation.
Plan the assembly order and cleanup process before applying adhesive or driving fasteners. Use the product instructions for open time, clamping, cure, ventilation, and disposal. This article does not prescribe those values.
Assemble and inspect deliberately
Follow the verified sequence and keep checking reference points. Fasteners and adhesive do not automatically correct misalignment. Stop when the assembly moves unexpectedly, support changes, or access becomes unsafe.
Allow adhesives and finishes to cure according to current manufacturer instructions before loading or using the object. “Dry to touch” and ready for service may be different conditions. Do not invent a waiting period from memory.
Inspect the finished object for stability, sharp edges, protruding hardware, pinch or entrapment points, finish condition, and suitability for the intended use. The relevant test depends on the design and may require qualified review.
Do not use the project beyond the plan’s scope. A decorative object should not become a step, seat, barrier, or load support because it appears sturdy.
Learn from the project without rewriting the evidence
After cleanup, compare the result with the plan and original project definition. Note which instructions were clear, which operations required help, what tool or material assumptions were wrong, and what should change before the next project.
Keep conclusions specific. “The clamp sequence was unclear” is useful. “This plan works for every beginner” is not supported by one project. Avoid turning personal results into generalized product claims.
The next project should add only manageable new complexity. Repeating a familiar operation can strengthen setup and judgment. Progress is not measured by buying more tools or choosing a more dramatic design.
Safety and skill limitations
This guide is not a substitute for tool manuals, material safety information, qualified instruction, engineering, code review, or professional trade work. Woodworking can involve blades, bits, electricity, dust, noise, finishes, force, unstable stock, heavy lifting, and fire risk.
Stop when an operation, material, structure, installation, utility, load, or intended user creates uncertainty beyond current competence. Projects involving buildings, electricity, plumbing, gas, children, animals, climbing, significant loads, or public use may require qualified professionals and local approvals.
Conclusion
Start by reducing uncertainty: define the job, choose a complete plan, map operations, audit the workspace, verify tools and materials, create checkpoints, rehearse safely, dry fit, assemble deliberately, and inspect the finished use. The plan should become more specific before the first irreversible step.
A beginner does not need a large tool collection or an ambitious project to begin learning. The strongest first project is one whose risks, instructions, and operations can be understood—and whose unclear parts can be postponed or taken to qualified help.
Related internal-link candidates
Compare plan-source roles in Best Online Woodworking Plan Collections for Beginners. Review one commercial candidate in TedsWoodworking Review 2026 and link back to the future Woodworking for Beginners hub for project-selection guidance.
FAQ
Is this a universal recommendation?
No. Fit depends on the reader’s situation and what can be verified now.
What should I verify next?
Confirm current instructions, materials, safety guidance, price, access, and refund or return terms.
When should I stop?
Stop when there is a safety concern or uncertainty beyond your current skills, and seek qualified help.